 English


How to Install Mobile Under Vehicle Inspection System Fast

1. Portable Under Vehicle Inspection Surveillance System main parts
 |
 |
 |
 |
|
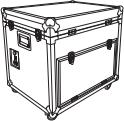
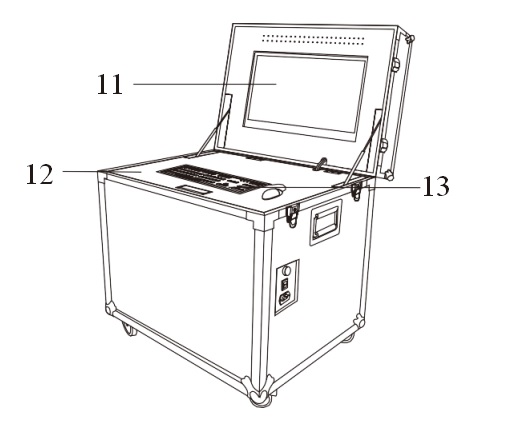
Flight case (built-in computer host,display,keyboard etc) |
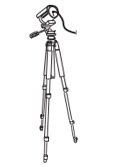
ANPR camera and tripod |
Rubber deceleration strip |
2. Flight case internal layout
 |
 |
 |
|
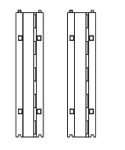
Flight case back face |
Flight case front face |
Under the upper cover plate is shake-proof cotton layout |
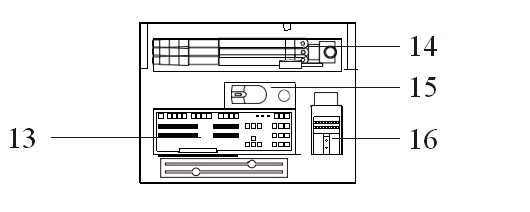
| 1. Flight case bottom | 2. Flight case upper cover | 3. External power source interface and power switch, etc. |
| 4. Radiator | 5. Computer mainframe box | 6. Slide tray |
| 7. Connection wire rod place | 8. Under vehicle scanner | 9. sliding plate tray shield |
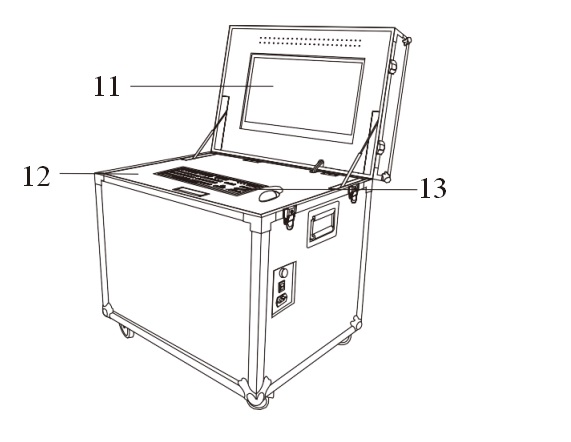
| 10. Flight case side door | 11. Screen | 12. Bottom lock cover |
| 13. Keyboard | 14. Spare lenses placed groove | 15.Tripod |
| 16. Mouse drop zone |
17.ANPR camera (Vehicle license plate recognition camera) |
|
*Note: Before closing the cover of flight case, the mouse must be back to the mouse drop zone which is under the upper cover plate with shake-proof cotton layout. Or the screen will be touched the mouse and pressed.
3. Installation of under vehicle inspection system
I.Take out the under-vehicle scanner from the flight case
 |
 |
|
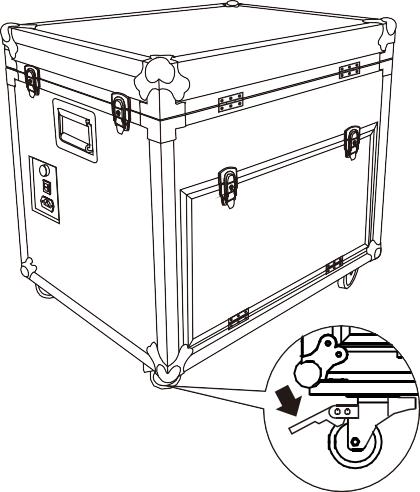
1. Push the flight case to the specify location, and then step the slide wheel pedals to fix pulleys and ensure the smooth and steady of case. |
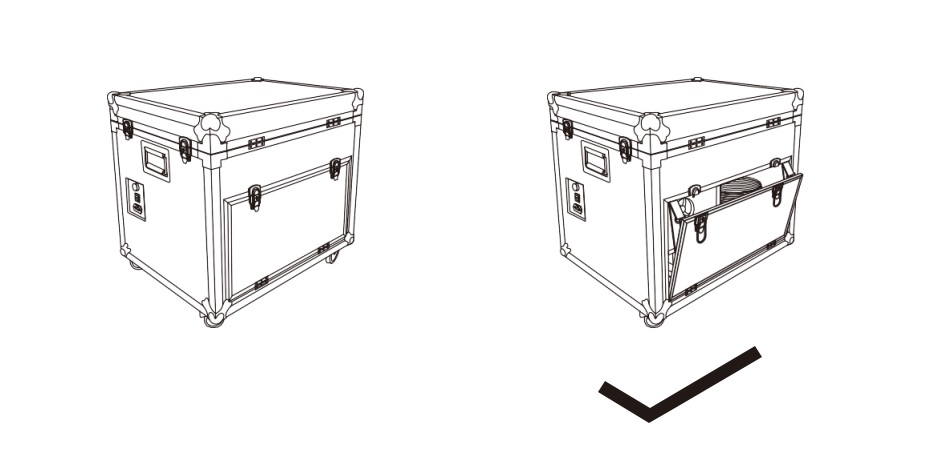
2. Open the back door, take out the shield of sliding plate tray |
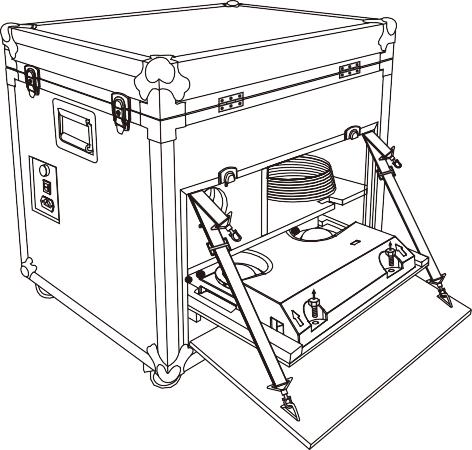 |
 |
|
3. Back-out the screw which is fixed the under- vehicle scanner on the tray. Then pull-out the tray in the biggest position. |
4. Put the hands on both sides of the under-vehicle scanner and move the scanner out. |
II.The way to put the under vehicle
A
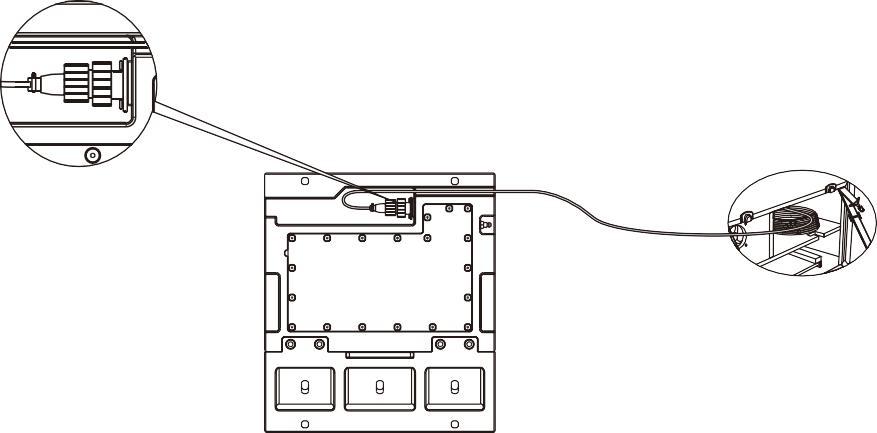
1. Finding out the aviation wire with plug in the drop zone. Connecting the aviation plug to the socket under the scanner and fixed (Refer to above pictures). The wire direction can be optional to right or left according to actual requirement.
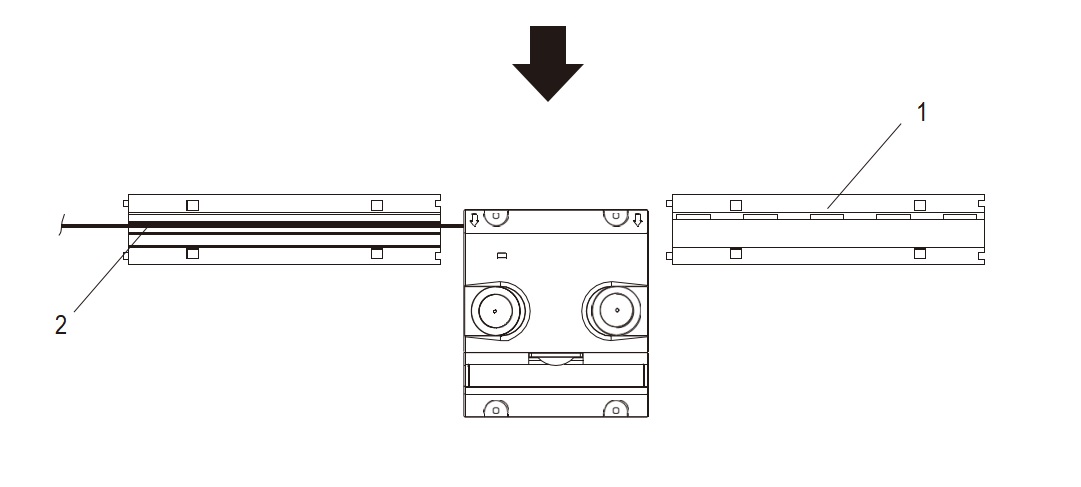
B

1. Refer to above picture, please keep the arrows in direction to the vehicle driving direction.
C
Vehicle entrance direction
1.Place two rubber deceleration strip on both sides of scanner. The end of deceleration strip should be aligned at the wire holes on the both sides of scanner.
2.Open one of the speed humps cover, put the host cable through the deceleration zone.
D
Vehicle entrance direction

1. Covering the lid of speed humps and screws all the accessories.
III. ANPR camera system placed
Vehicle entrance direction
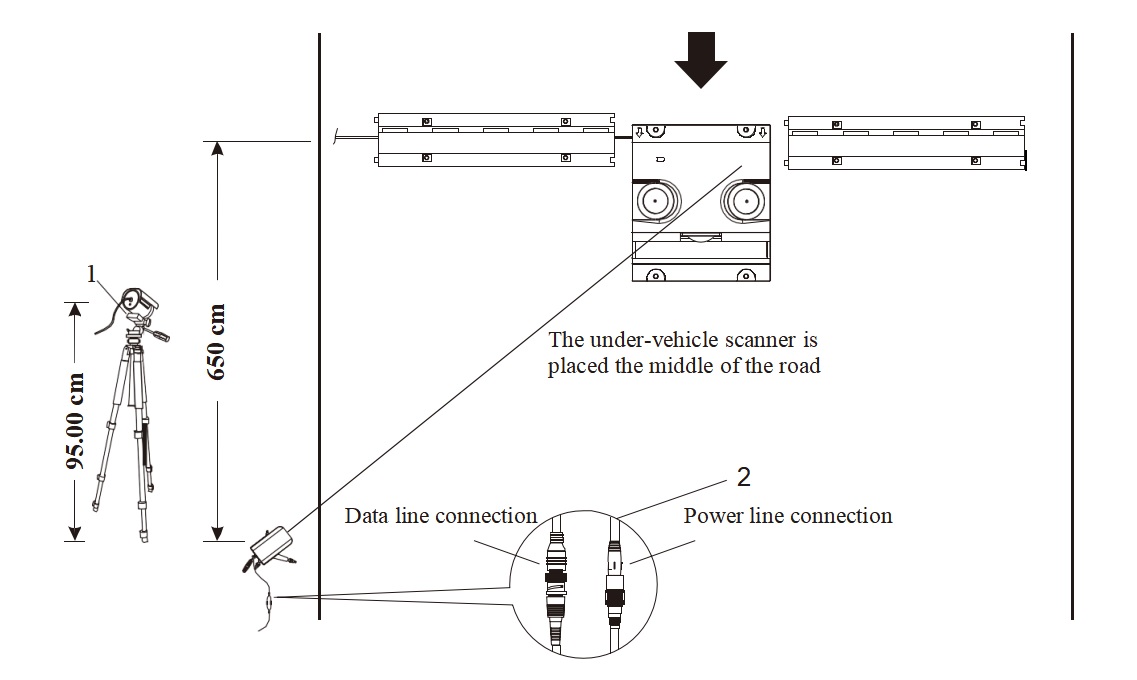
1.Fastening the ANPR camera on the tripod and adjusting the height away from
ground is 95cm. The ANPR camera is vertical with the center of decelerating board
in the distance of 650cm and placed it besides the road and close to the flight case side, which is in the outer edge of the road, the direction of the lens must be toward to center of the under-vehicle scanner.
2.Find out the data cable and wire dual interface power cable from the flight case, then connect with the side of ANPR camera.
IV.Main line connection
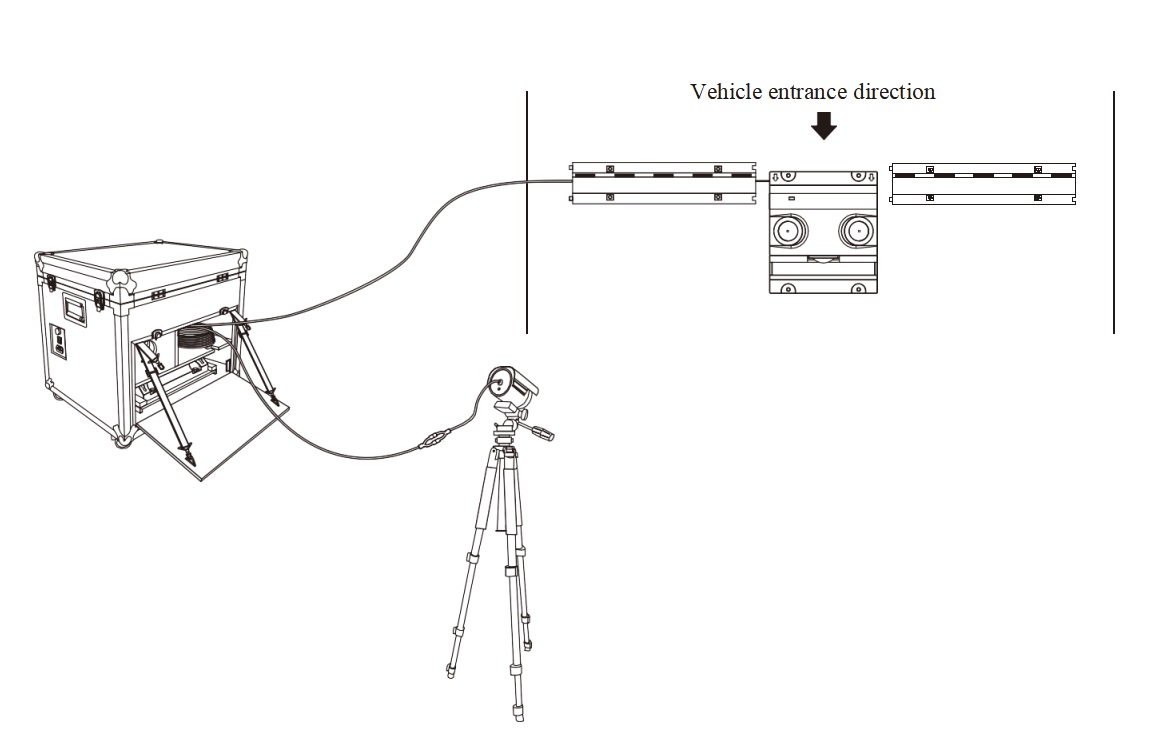
1.The wire placement area and the wire connections schematic as below.
V.Starting way of under vehicle inspection system
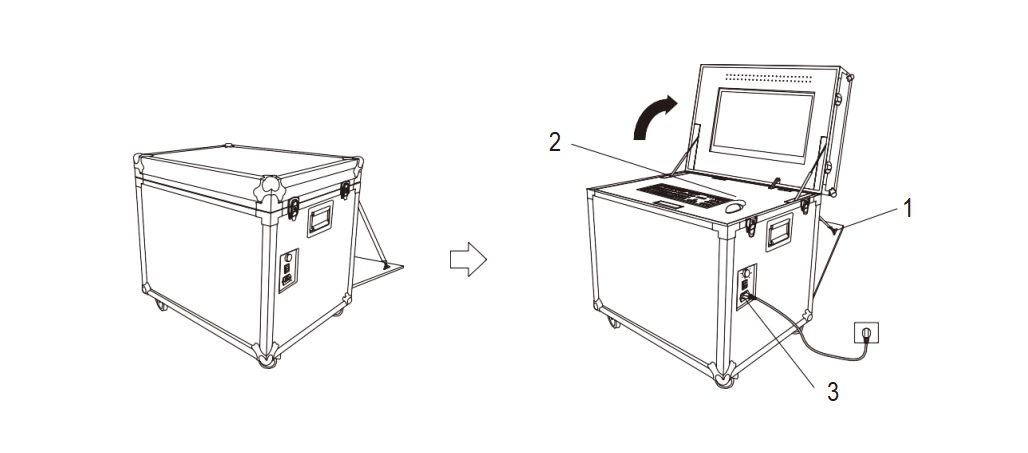
1.Get out the bracket for fixing the cover.
2.Open the lid of flight case and move out the mouse from the cotton quake-proof zone.
3.With a power cord to connect an external AC power, depress the rocker switch to “I” position, then switch on and light on.
4.Starting the host computer of under vehicle inspection system and the screen starts displaying data.
VI.Overall connection diagram
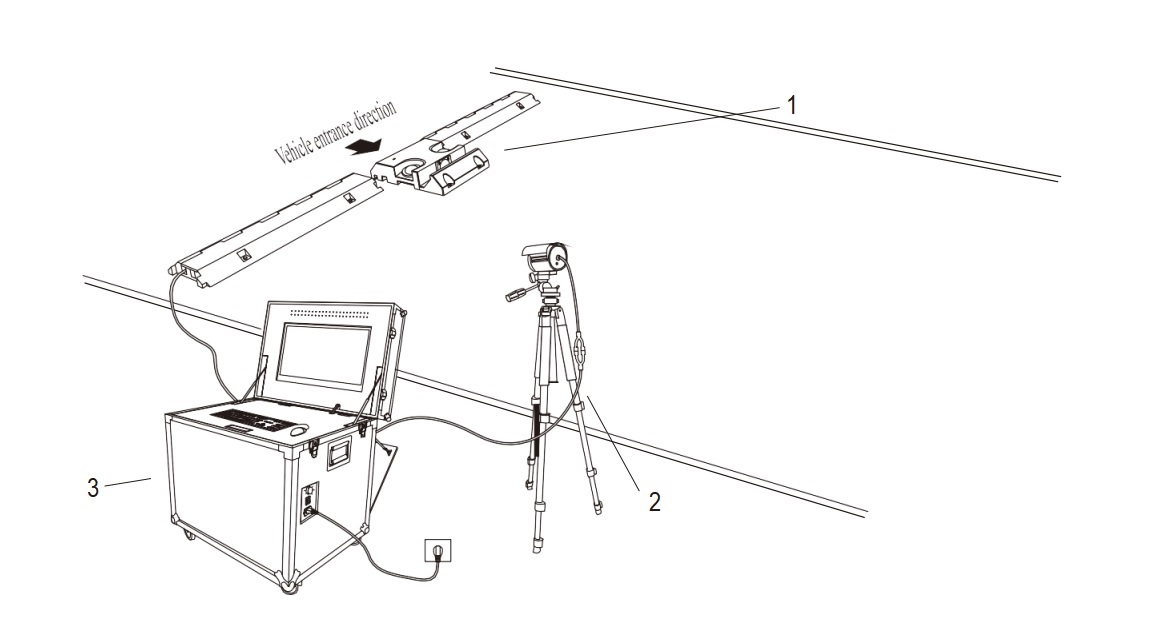
1.Under vehicle scanner 2. ANPR camera 3. Under vehicle control system
4.Cabinet operation of the main considerations
1.Runtime
*Note: When the system is running, the flight case cannot be completely closed, box or the main computer cannot heat dissipation.
2.Closing the cover
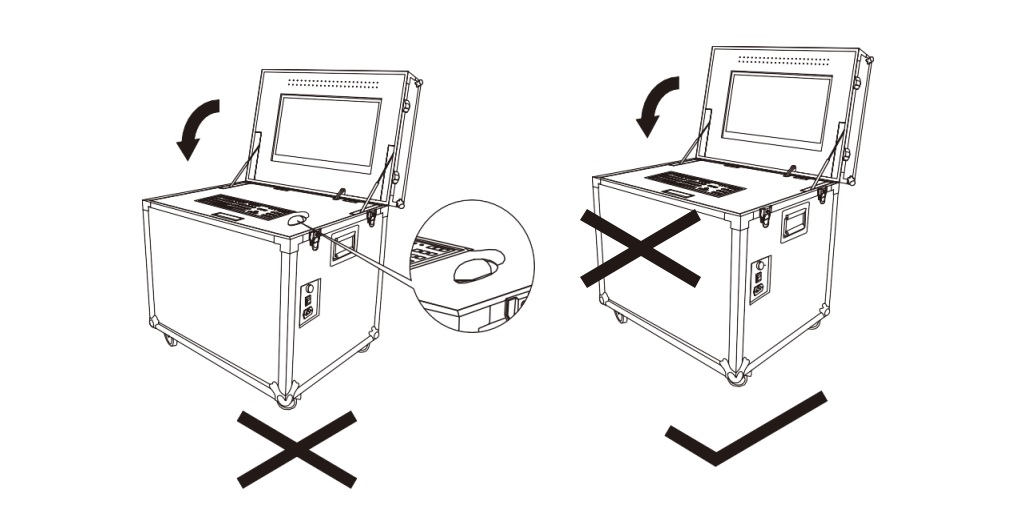
* Note: When you want to close the cover, please put the mouse back to mouse placement region, clean up the objects on the upper cover of keyboard, or the screen lid will be pressed the mouse and cannot seal.
Categories
New Blog
For inquiries about our products or pricelist, please leave to us and we will be in touch within 24 hours.
Copyright © 2026 Secudetequip. All Rights Reserved. Power by

IPv6 network supported
